Gutter Drip Edge Extender: A Complete Guide to Extending Your Roof's Lifespan

Big T Gutters • August 9, 2025

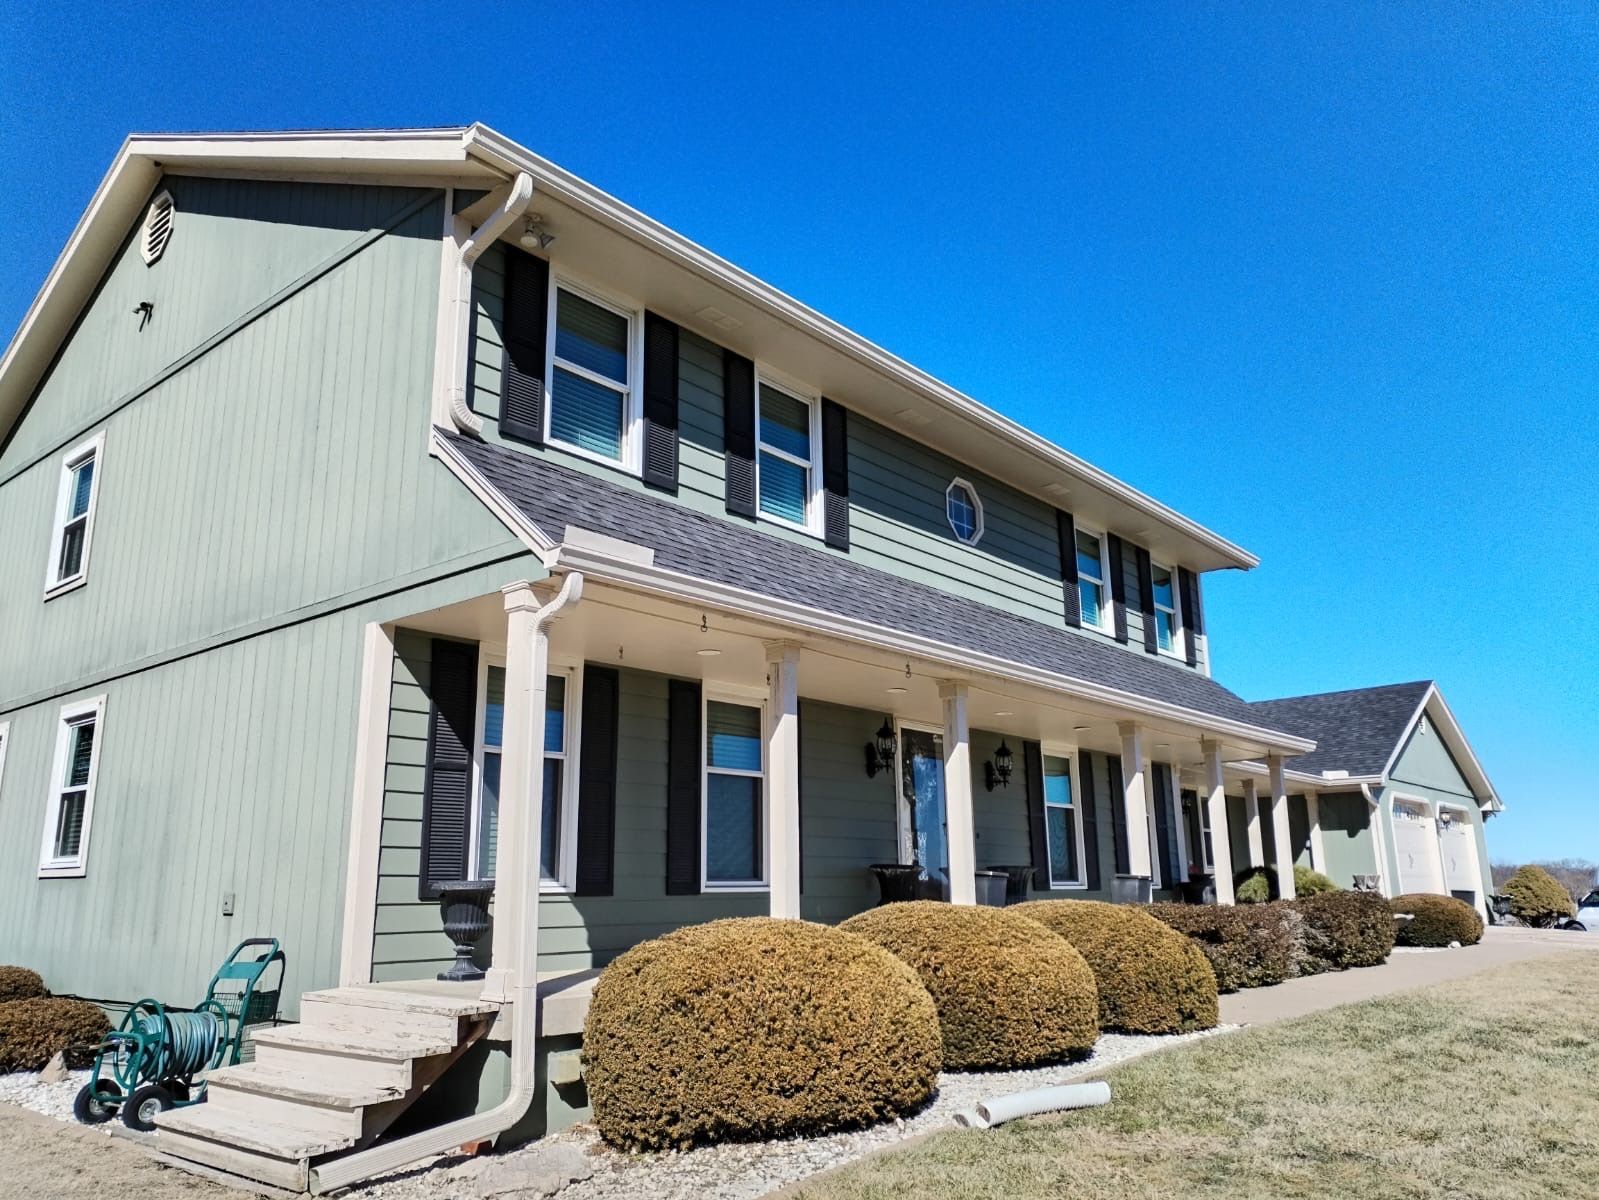
     Protecting your home from water damage starts at the roof's edge, where proper drainage can make all the difference. A gutter drip edge extender is a simple yet crucial component that bridges the gap between your roof's drip edge and gutter system, ensuring water flows directly into the gutters instead of seeping behind them.

     These specialized metal strips solve a common problem many homeowners face when their gutters can't be properly positioned under the roof's drip edge due to steep pitches or architectural constraints. Available in various sizes and materials, drip edge extenders typically range from 1.5 to 2.5 inches wide and feature a bent design that guides water safely into your gutter system.

     Professional installation of a drip edge extender prevents costly water damage to your fascia boards, siding, and foundation. This small investment helps maintain your home's structural integrity and extends the lifespan of your gutter system by ensuring proper water management.

Key Takeaways

  • Drip edge extenders bridge gaps between roof edges and gutters to prevent water damage
  • Metal extensions come in various sizes to accommodate different roof pitches and configurations
  • Professional installation ensures optimal water flow and protects home structural components

What Is a Gutter Drip Edge Extender?

     A gutter drip edge extender is a specialized metal component that connects your roof's drip edge to the gutter system. This simple yet crucial addition helps ensure proper water flow from your roof into the gutters.

Primary Function and Purpose

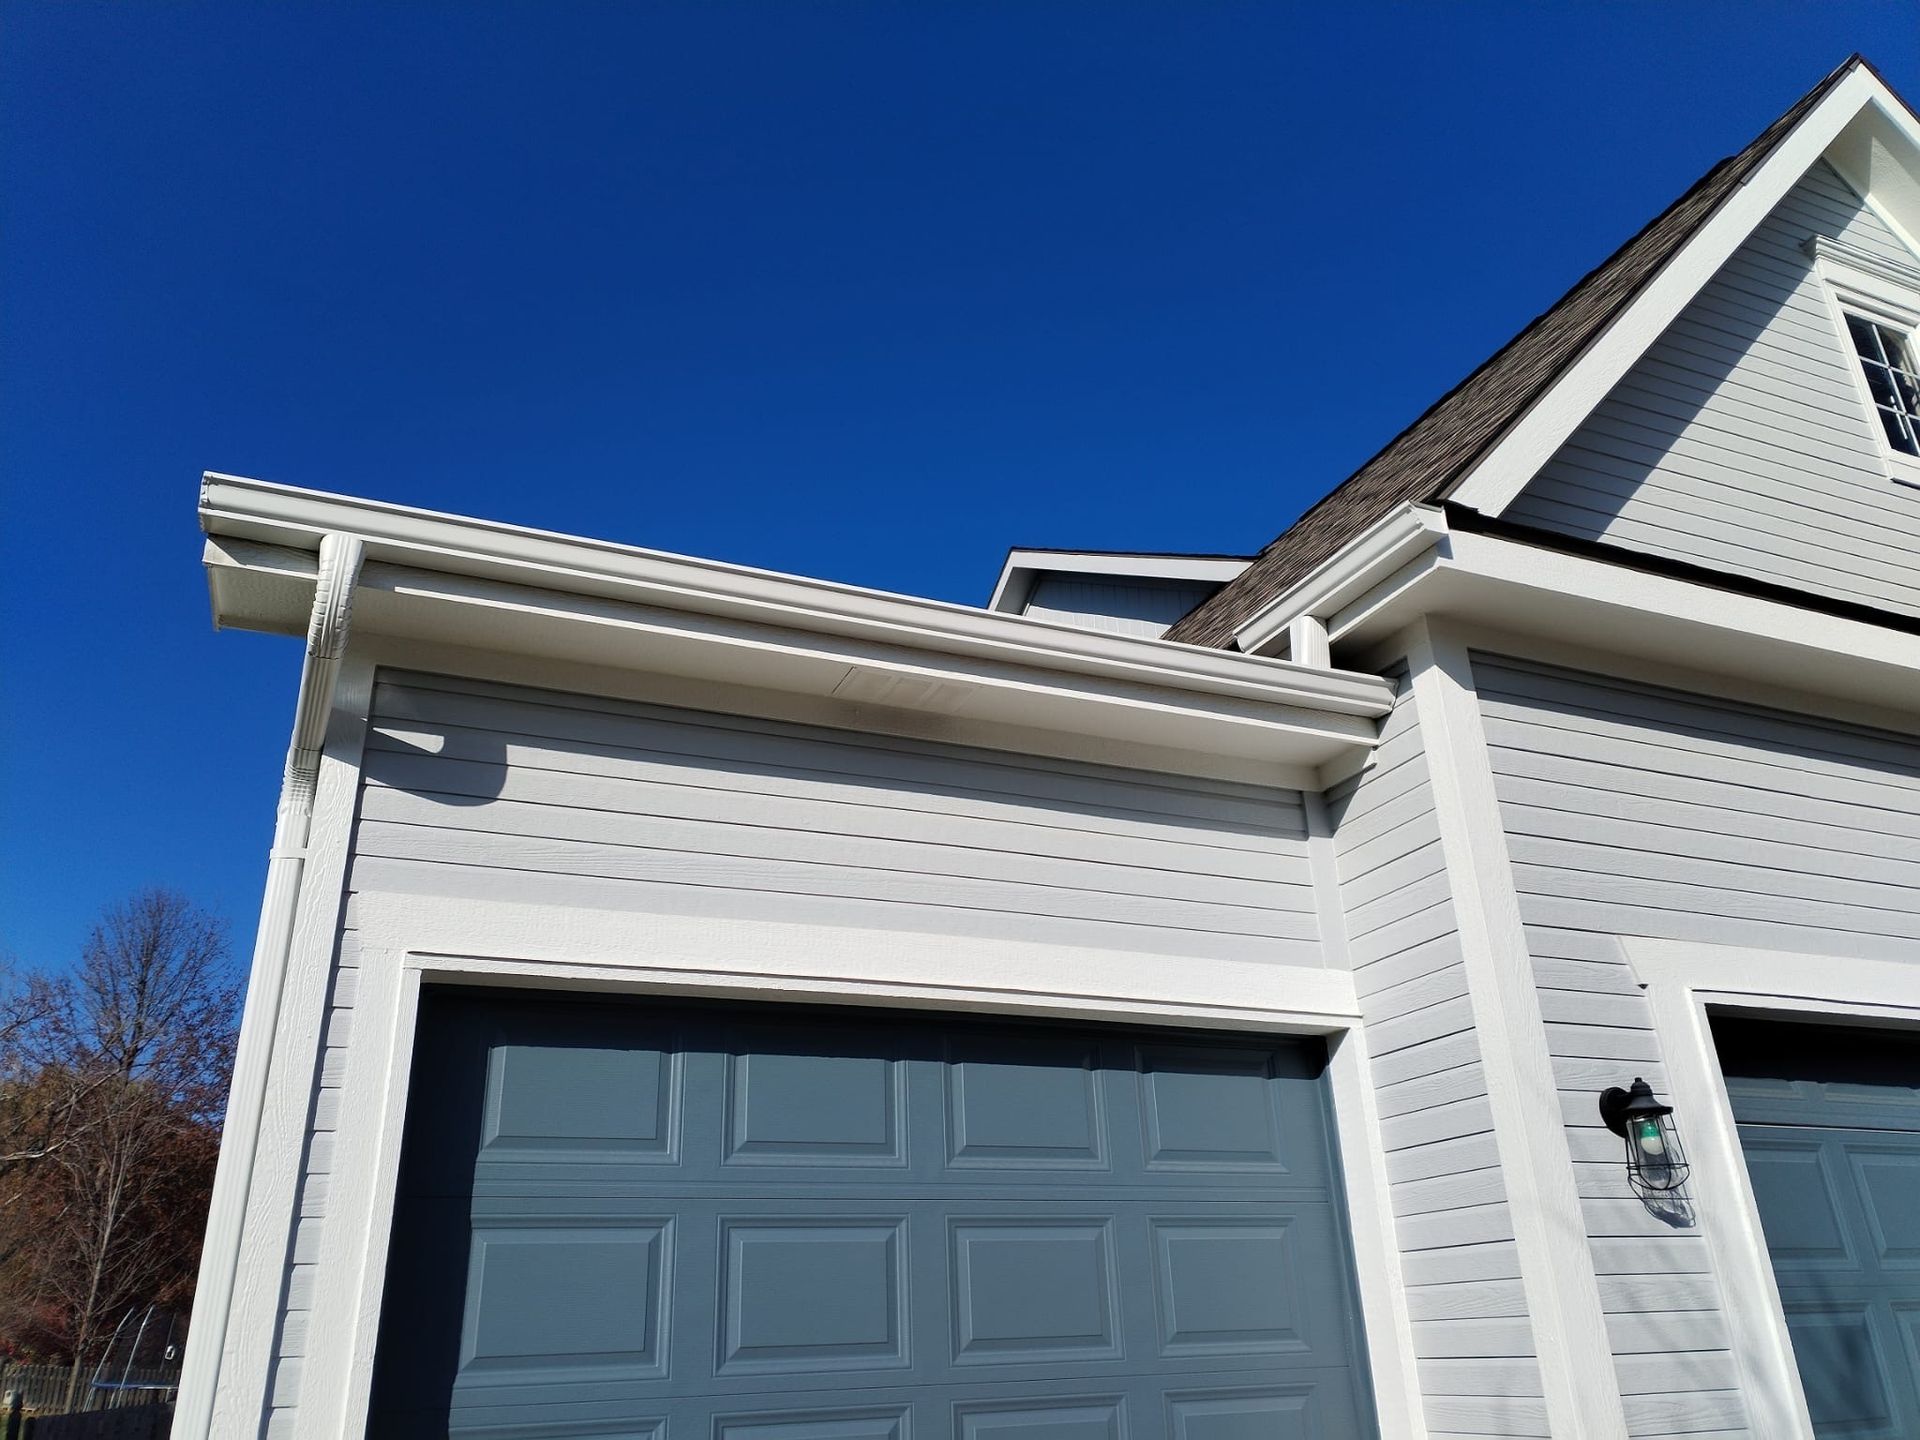
     Drip edge extenders bridge gaps between the roof's drip edge and gutters when standard installation isn't possible due to steep roof pitches or structural limitations. They prevent water from seeping behind gutters and damaging fascia boards.

These extensions typically measure 2-2.5 inches wide and are made from durable aluminum or galvanized steel to match existing components.

The primary goal is to create a seamless pathway for rainwater to flow directly into the gutter system, eliminating potential weak points where water might collect or misdirect.

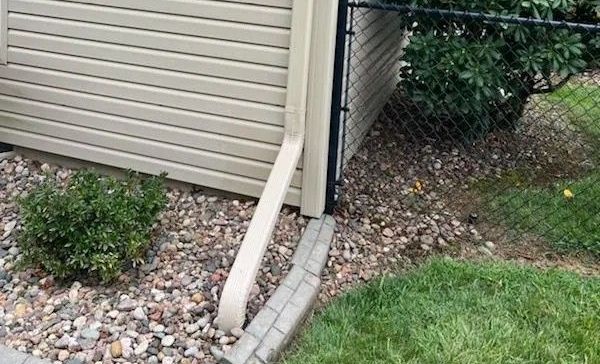
How Drip Edge Extenders Work with Gutters

The extender attaches under the existing drip edge and extends over the back wall of the gutter. Proper installation requires positioning one edge beneath the drip edge while the other edge rests inside the gutter's back lip.

The extender must maintain a slope that matches the gutter's pitch to ensure proper water flow. A correct installation includes an extension of 1/4 to 3/4 inch into the gutter channel.

Professional installation guarantees proper alignment and prevents issues like water backing up or spilling behind the gutter system.

For maximum effectiveness, the extender should be free from debris and checked regularly during gutter maintenance.

Benefits of Installing a Gutter Drip Edge Extender

Installing a gutter drip edge extender provides essential protection for your home's structural elements while maximizing the efficiency of your water management system. These components create a crucial barrier between water and your home's vulnerable areas.

Protection Against Water Damage

A gutter drip edge extender creates a reliable shield that prevents rainwater from seeping behind your gutters and underneath roofing materials. This protection stops water from infiltrating your roof deck and causing costly structural damage.

The extender's design forces water to flow directly into the gutter channel instead of trickling down your home's exterior walls. This precise water control helps prevent basement flooding and foundation issues.

By directing water away from the roof's edge, these extenders reduce the risk of ice dams forming during winter months. This protection is especially valuable in areas with heavy rainfall or snow.

Improved Water Flow and Gutter Efficiency

Drip edge extenders optimize your gutter system's performance by ensuring proper water flow. The extended lip guides rainwater efficiently into the gutter channel, reducing splash-over during heavy storms.

These components work with your existing gutters to increase their water-handling capacity. The improved angle and extension help manage larger volumes of water without overflow.

Your gutters stay cleaner longer because the extender helps prevent debris from collecting at the roof's edge. This reduces maintenance frequency and extends the life of your gutter system.

Preservation of Fascia and Soffit

The extended overhang keeps water from making contact with your fascia boards, preventing rot and decay. This protection is crucial for maintaining the structural integrity of your roof's edge.

Paint and finish on fascia boards last longer when protected by drip edge extenders. The reduced moisture exposure helps preserve both wood and metal fascia materials.

Soffits remain dry and protected from water infiltration that can lead to mold growth and wood deterioration. This protection helps maintain proper attic ventilation.

Supporting Long-Term Home Maintenance

Regular inspections become easier with drip edge extenders in place. The visible edge allows quick identification of potential issues before they become major problems.

These components reduce the frequency of repairs needed for roofing materials and gutters. The investment typically pays for itself through decreased maintenance costs over time.

Drip edge extenders integrate seamlessly with most roofing materials and gutter styles. Their durability means they'll continue protecting your home for many years with minimal upkeep required.

Material Options for Gutter Drip Edge Extenders

Choosing the right material for your drip edge extender impacts durability, aesthetics, and long-term performance. Each material brings distinct advantages in terms of strength, weather resistance, and cost-effectiveness.

Aluminum Drip Edge Extenders

Aluminum stands as the most popular choice for drip edge extenders due to its excellent balance of durability and cost. These extenders typically come in .019 to .024-inch thickness grades.

The material resists rust and corrosion while remaining lightweight for easy installation. Most aluminum extenders feature a powder-coated finish that prevents oxidation and matches common gutter colors.

Key Benefits:

  • Lightweight yet strong
  • Rust-resistant
  • Cost-effective
  • Wide range of color options
  • 20+ year lifespan

Copper Drip Edge Extenders

Copper drip edge extenders offer premium performance and develop an attractive patina over time. The material typically comes in 16-20 oz weights per square foot.

These extenders excel in coastal areas due to their superior resistance to salt spray and harsh weather conditions. The natural antimicrobial properties help prevent algae growth.

Premium Features:

  • Exceptional durability
  • Natural patina development
  • 50+ year lifespan
  • Superior weather resistance
  • Enhanced curb appeal

Vinyl Drip Edge Extenders

Vinyl provides an economical solution for drip edge extension needs. These extenders work well in mild climates and offer simple installation options.

The material remains flexible during temperature changes and resists impact damage. Vinyl extenders come pre-colored and never need painting.

Important Considerations:

  • Budget-friendly option
  • UV-resistant formulations available
  • 10-15 year average lifespan
  • Limited color selection
  • Best for moderate climates

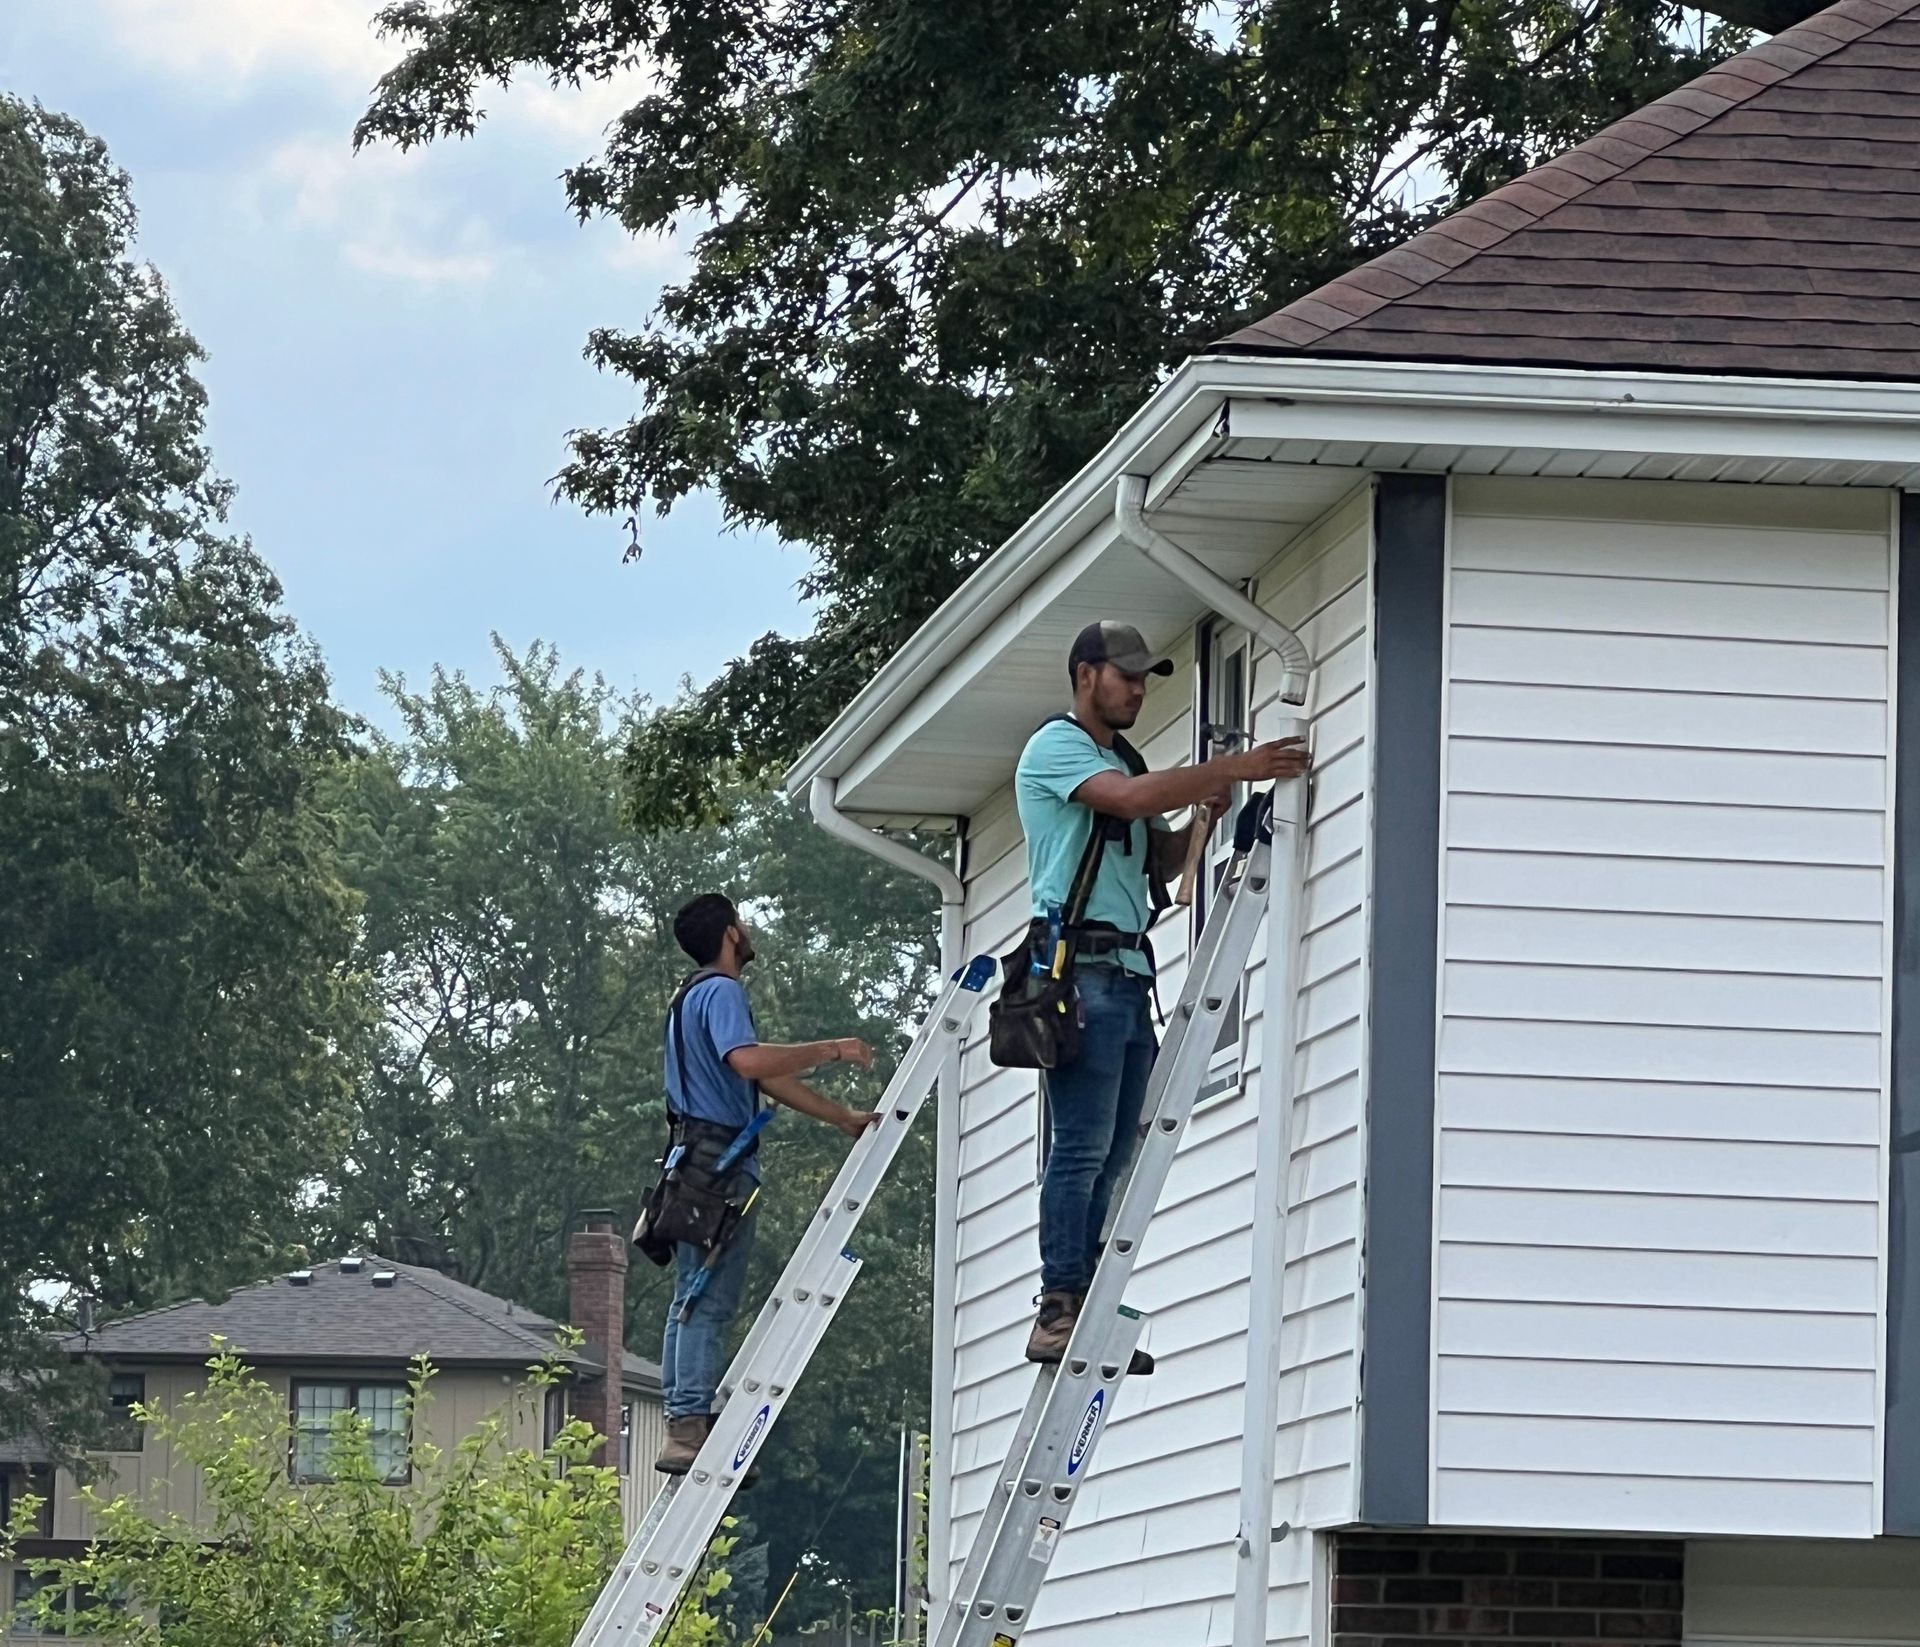
Installation and Maintenance Tips

Proper installation and regular maintenance of gutter drip edge extenders protect your home from water damage while maximizing their effectiveness. Following industry best practices ensures a watertight seal and long-lasting performance.

Preparation and Measurement

Measure the total length of your gutters and add 10% extra for overlap cuts. Purchase aluminum or vinyl drip edge material rated for your climate zone.

Required Tools:

  • Tin snips
  • Measuring tape
  • Pencil
  • Safety gloves
  • Work ladder
  • Power drill
  • Roofing nails
  • Level

Check the fascia board for any rot or damage before installation. Replace damaged sections to ensure a solid mounting surface.

Mark your measurements clearly on both the drip edge material and gutters. Pre-drill mounting holes every 24 inches.

Step-by-Step Installation Overview

Remove existing gutter fasteners and pull gutters slightly away from the fascia board.

Clean the installation area thoroughly, removing debris and old caulk.

Insert the drip edge under the first row of shingles and over the back edge of the gutter. The edge should extend 1/4 to 3/4 inch into the gutter.

Secure the drip edge with roofing nails every 12 inches along the roof line. Use corrosion-resistant screws to reattach the gutter through the drip edge.

Test the installation by spraying water on the roof. Check for proper drainage and adjust if needed.

Routine Maintenance and Inspections

Check drip edge connections every spring and fall during gutter cleaning.

Look for these potential issues:

  • Loose fasteners
  • Rust or corrosion
  • Separation from fascia
  • Bent or damaged sections

Clean debris from the drip edge channel monthly during peak leaf-falling seasons.

Apply a rust-inhibiting coating to metal drip edges every 2-3 years to prevent deterioration.

Replace any sections showing significant wear or damage immediately to prevent water infiltration behind the gutters.

Test water flow after heavy storms to ensure proper drainage continues.

You might also like

By Big T Gutters August 30, 2025
Discover the best gutter guards for maple trees. Missouri homeowners can protect gutters from clogging with expert tips and professional guidance.
By Big T Gutters August 6, 2025
Learn how professional drip edge installation improves gutter performance and protects your home's foundation from costly water damage.
By Big T Gutters August 3, 2025
Dripping gutter joints can lead to serious water damage, compromising your home's foundation and exterior walls. The most common causes of leaking gutter joints are loose connections, deteriorated sealant, or improper installation, which can usually be fixed with basic tools and materials from any hardware store. Water damage from leaking gutter joints often starts small but can escalate into costly repairs if left unchecked. The telltale signs include water streaks on exterior walls, puddles near your foundation, or visible drips during rainfall. Catching these issues early can save thousands in potential repair costs. When your gutters work properly, they protect your home by channeling rainwater away from vulnerable areas. Regular inspection and maintenance of gutter joints helps prevent water infiltration and extends the life of your gutter system. Key Takeaways Leaking gutter joints typically result from loose connections or failed sealants that require prompt attention Regular inspection of gutter joints prevents costly water damage to your home's structure Simple DIY repairs with proper materials can effectively solve most gutter joint leaks Why Gutters Drip at Joints: Main Causes Gutter joints represent critical connection points in your home's drainage system where water frequently escapes due to specific structural and environmental factors. These connection points face unique stresses that can compromise their water-tight seal. Aging and Wear of Gutter Joints Natural settling of your home creates subtle movements that strain gutter joints over time. These tiny shifts gradually weaken the seals between gutter sections. Temperature fluctuations cause expansion and contraction of gutter materials, which puts additional stress on joint connections. This repeated movement loosens fasteners and breaks down sealants. Joint deterioration often starts small but progresses rapidly without intervention. A tiny gap can expand into a significant leak within just one or two seasons. Improper Installation and Poor Sealing Common Installation Issues: Incorrect spacing between sections Misaligned joints Wrong type of sealant used Insufficient fasteners Poor initial sealing leads to immediate or near-term leaks at joints. The wrong sealant choice can fail prematurely, especially in harsh weather conditions. Professional installation requires precise measurements and proper overlap at each joint. Even a small misalignment of 1/4 inch can create a path for water to escape. Debris and Clogged Gutters Leaves, twigs, and other debris collect around joints, trapping moisture against seals. This trapped moisture accelerates seal deterioration. Standing water from clogs puts extra weight on joints, causing them to sag and separate. The added pressure can break down even properly installed connections. Regular cleaning prevents debris accumulation at joints. Quarterly maintenance helps identify potential joint issues before they become serious leaks. Impact of Gutter Materials and Corrosion Material Vulnerabilities: Aluminum: Susceptible to galvanic corrosion Steel: Rust formation at joints Vinyl: UV damage to seals Copper: Green patina development Metal gutters face unique challenges from corrosion at joints. Salt air in coastal areas speeds up this corrosion process significantly. Different metals meeting at joints can create galvanic reactions. This chemical process weakens joint connections and creates pinhole leaks. Quality gutter materials with compatible components resist joint failures longer. Seamless gutter systems eliminate many joint-related issues entirely. How to Detect and Assess Leaking Gutter Joints Identifying gutter joint leaks requires methodical inspection and testing to pinpoint exact problem areas. Early detection helps prevent extensive water damage and costly repairs to your home's structure. Visual Signs of Leaking Gutter Joint Look for water stains or discoloration along the gutter seams during dry weather. These marks often appear as dark streaks or rust spots near the joints. Check for gaps, separations, or visible cracks where gutter sections meet. Even small openings can lead to significant leaks over time. Key indicators of joint problems: Rust or corrosion around metal fasteners Loose or missing screws at connection points Visible separation between gutter sections Peeling paint or oxidation near joints Water Testing Techniques Run water through your gutters with a garden hose on a dry day. Start at the highest point and observe water flow through each joint. Mark leak locations with chalk or tape for later repair. Pay special attention to corner joints (miters) where two sections meet at angles. Testing steps: Fill gutters slowly with water Watch for drips or streams at joints Check both inside and outside the gutter Test during daylight for better visibility Recognizing Related Water Damage Examine your home's exterior walls for water stains extending downward from gutter joints. These stains indicate ongoing leakage problems. Inspect the ground below suspect joints for erosion or water pooling. Saturated soil and damaged landscaping often reveal hidden leaks. Look for mold growth or rotting wood near gutter joints. These signs suggest long-term moisture exposure requiring immediate attention. Issues With Fascia Board and Downspouts Check fascia boards near gutter joints for soft spots, warping, or decay. Water penetration through failed joints often damages these supporting structures first. Examine downspout connections for proper alignment and secure attachment. Loose or misaligned downspouts put extra stress on nearby joints. Warning signs: Sagging gutters near joint areas Separated downspout connections Wet or discolored fascia boards Loose gutter hangers near joints Effective Repair and Prevention Strategies Fixing dripping gutter joints requires a systematic approach using the right materials and techniques. Professional-grade sealants, proper cleaning methods, and precise alignment work together to create lasting repairs. Cleaning and Preparing the Gutter Joint Remove all debris from the gutter using a plastic scoop or gloved hands. Pay special attention to the area around the leaking joint. Use a wire brush to thoroughly clean both sides of the joint, removing old sealant and any corrosion. A clean surface ensures better adhesion of new sealant. Dry the area completely with a clean cloth. Even small amounts of moisture can prevent proper bonding of repair materials. Test the joint alignment by running water through the gutter. Mark any spots where water pools or doesn't flow properly. Applying Gutter Sealant and Caulk Choose a waterproof gutter sealant rated for exterior use. Silicone-based products offer superior durability and flexibility. Apply a thick bead of sealant along the inside of the joint. Press firmly to work the material into any gaps or seams. For metal gutters, roofing cement provides an extra layer of protection when applied over the initial sealant layer. Let the sealant cure for 24 hours before testing. Avoid applying sealant if rain is forecast within the next day. Replacing Brackets and Re-Aligning Joints Check bracket spacing - they should be placed every 2 feet along the gutter length. Replace any loose or damaged brackets immediately. Adjust bracket heights to ensure proper slope. Gutters should drop 1/4 inch for every 10 feet toward the downspout. Use a level to verify alignment when installing new brackets. Misaligned supports can create pressure points that cause leaks. Tighten all fasteners securing the gutter to the fascia board. Loose connections contribute to joint separation. When Gutter Replacement Is Necessary Signs that indicate replacement need: Multiple failing joints Severe rust or corrosion Recurring leaks despite repairs Separated seams that won't stay sealed Professional gutter replacement services become cost-effective when repairs require more than 3-4 joint fixes. Consider seamless gutters for new installations. They eliminate most joint-related issues and typically last 20+ years. Upgrading to larger 6-inch gutters may solve persistent overflow problems that stress joints and connections. Long-Term Protection and Maintenance Tips Protecting your gutters from future drips and leaks requires a systematic approach focused on prevention and regular upkeep. Strategic maintenance combined with quality materials and proper installation techniques will maximize the lifespan of your gutter system. Gutter Guards and Preventing Clogs Types of Gutter Guards: Mesh screens Foam inserts Perforated metal covers Brush-style guards Gutter guards act as your first line of defense against debris accumulation. They block leaves, twigs, and other materials while allowing water to flow freely through the system. Select guards that match your local environment. Homes near pine trees need finer mesh compared to those dealing mainly with larger leaves. Professional installation ensures proper fit and prevents guard separation that could lead to water overflow. Check guards quarterly for damage or sagging. Maintaining Proper Gutter Slope The ideal gutter slope is 1/4 inch drop per 10 feet of gutter length toward the downspout. An incorrect slope causes water pooling and joint stress. Signs of Poor Slope: Standing water after rain Overflow during light rainfall Water marks under gutters Sagging sections Use a level to check slope annually. Mark problem areas for adjustment. Professional realignment may be needed if multiple sections show improper pitch. Small adjustments can often be made by repositioning hangers. Inspecting and Securing Gutter Hangers Check gutter hangers every spring and fall. Replace any that show rust, bending, or pulling away from the fascia board. Optimal Hanger Spacing: Every 2 feet in snowy regions Every 3 feet in moderate climates Additional support near downspouts Loose hangers create low spots where water collects. Tighten all fasteners during inspection. Use corrosion-resistant hangers rated for your gutter size and local weather conditions. Add supplemental supports in areas that regularly collect ice or heavy debris. Material Selection and Professional Maintenance Choose materials based on your climate and budget. Seamless aluminum offers excellent durability for most homes. Copper and steel provide enhanced strength for severe weather zones. Schedule professional inspections every 2 years. Experts can spot early signs of joint separation and perform specialized repairs. Key Maintenance Tasks: Seal joints with gutter-specific caulk Replace worn fasteners Repair small holes promptly Clean gutters thoroughly twice yearly Apply protective coatings to extend material life. Anti-corrosion treatments help prevent rust in metal systems.

Book a Service Today