Gutters Drip Edge Installation: A Professional Guide to Protecting Your Home's Foundation

Big T Gutters • August 6, 2025

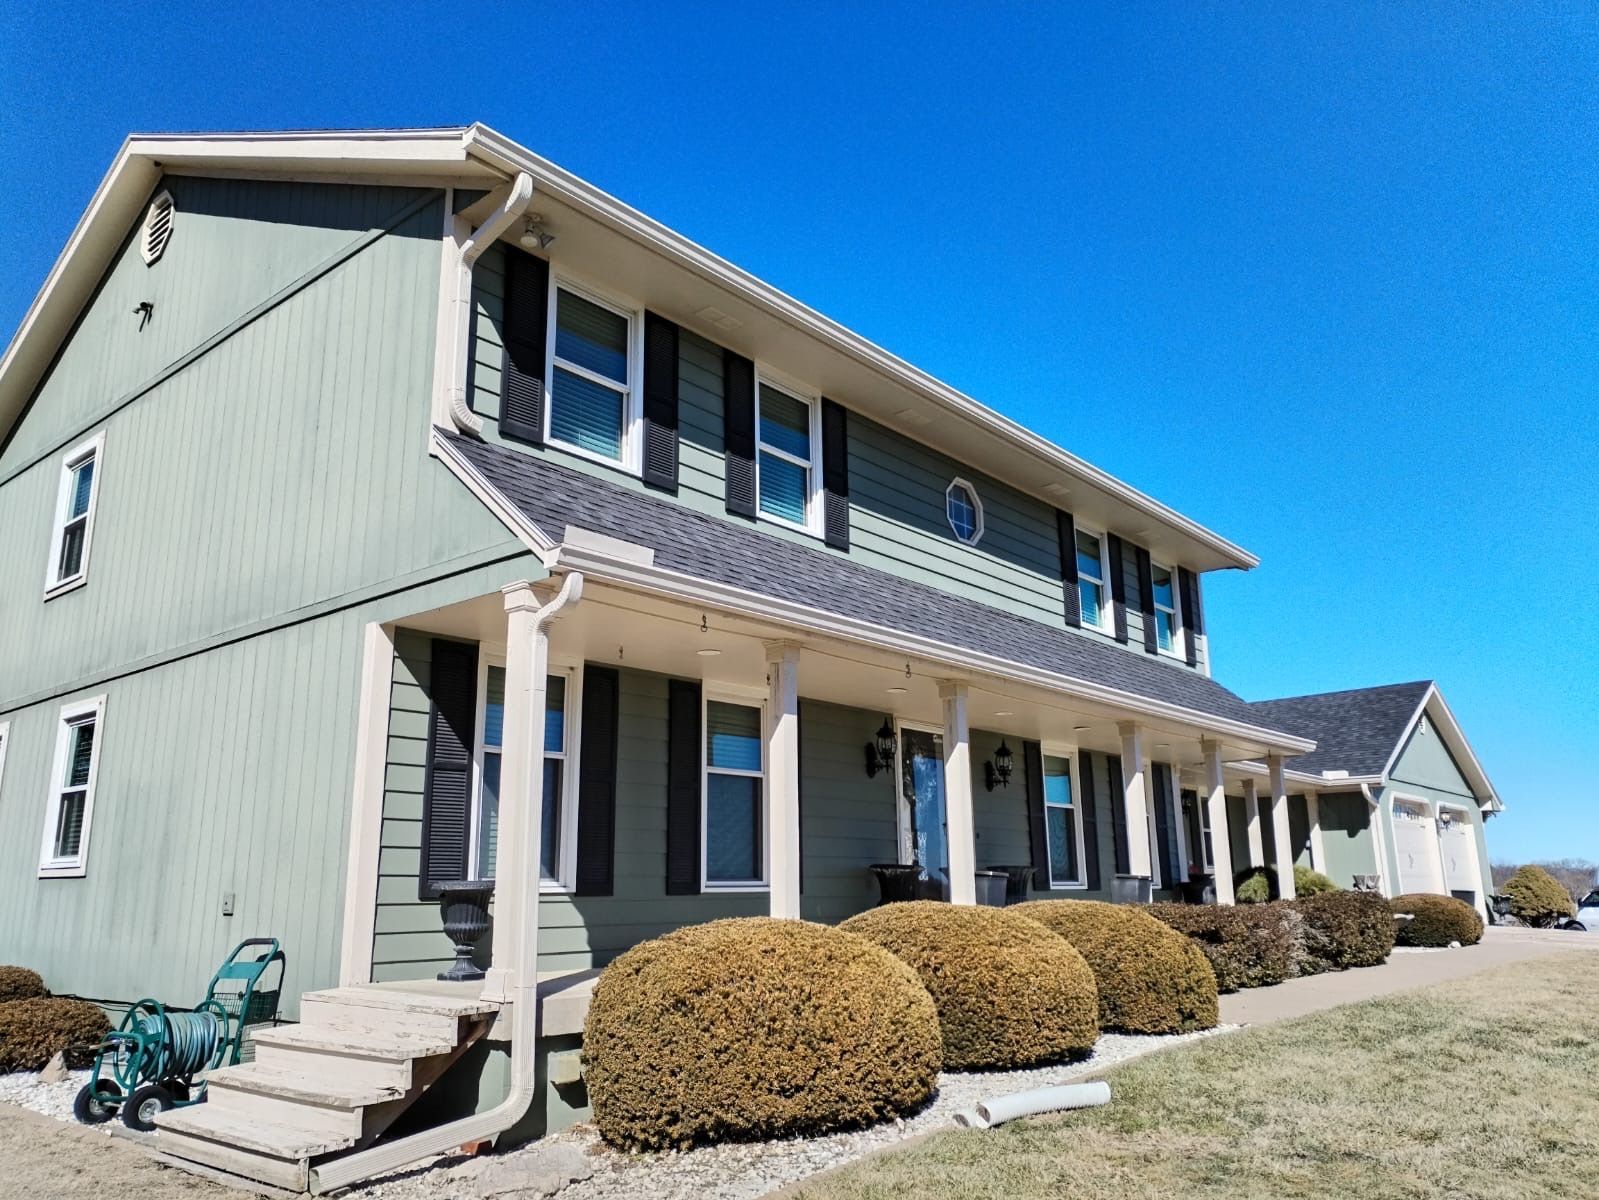
     Protecting your home from water damage starts with proper gutter and drip edge installation. The combination of these two essential components creates an effective water management system that safeguards your roof, walls, and foundation. A correctly installed drip edge directs rainwater into your gutters while preventing moisture from seeping under your shingles and damaging your roof structure.

     Professional gutter installation with drip edge can prevent costly repairs and extend the life of your roofing system. The metal strip along your roof's edge works in harmony with your gutters to channel water away from vulnerable areas like the fascia board and soffit. This setup is particularly important during heavy rainfall and winter months when ice dams can form.

     Installing gutters with drip edge requires attention to detail and precise measurements. The drip edge must extend slightly over the fascia board and align perfectly with the gutters to ensure optimal water flow. Quality materials like aluminum or galvanized steel provide durability and long-term performance for this critical roofing component.

Key Takeaways

  • Proper drip edge installation prevents water damage and extends roof life
  • High-quality materials and precise measurements ensure optimal performance
  • Regular maintenance keeps the gutter system functioning effectively

Understanding Drip Edge for Gutters

     A drip edge forms a crucial barrier between your roof and fascia board, directing water safely into your gutters while protecting your home from moisture damage.

What Is a Drip Edge?

     A drip edge is an L-shaped metal flashing that extends from under the first row of shingles and hangs over the gutter. The piece measures about 2-3 inches in both directions, with one side sliding under the shingles and the other creating a downward slope.

     The metal strip creates a crisp edge that forces water to drip straight into the gutter rather than seeping behind it or clinging to the fascia board.

Professional roofers install drip edges at three key locations:

  • Eaves (horizontal roof edges)
  • Rakes (sloped roof edges)
  • Gable ends

Role of Drip Edge in the Roofing System

     Drip edges prevent water from damaging your home's structure in several ways. They stop moisture from creeping under shingles and rotting the roof deck.

The metal flashing shields your fascia boards from water damage and decay that could compromise your entire gutter system.

A properly installed drip edge also:

  • Blocks pests from entering roof spaces
  • Supports shingle edges
  • Reduces the risk of ice dams
  • Protects against wind-driven rain

Common Drip Edge Materials

Galvanized Steel

  • Most popular choice
  • Rust-resistant coating
  • 15-20 year lifespan

Aluminum

  • Lightweight and corrosion-resistant
  • Easy to bend and shape
  • Ideal for coastal areas

Copper

  • Premium material choice
  • Extremely durable
  • Develops attractive patina over time

     The material thickness typically ranges from 0.019 to 0.024 inches, with regional building codes often specifying minimum requirements.

Why Proper Drip Edge Installation Matters

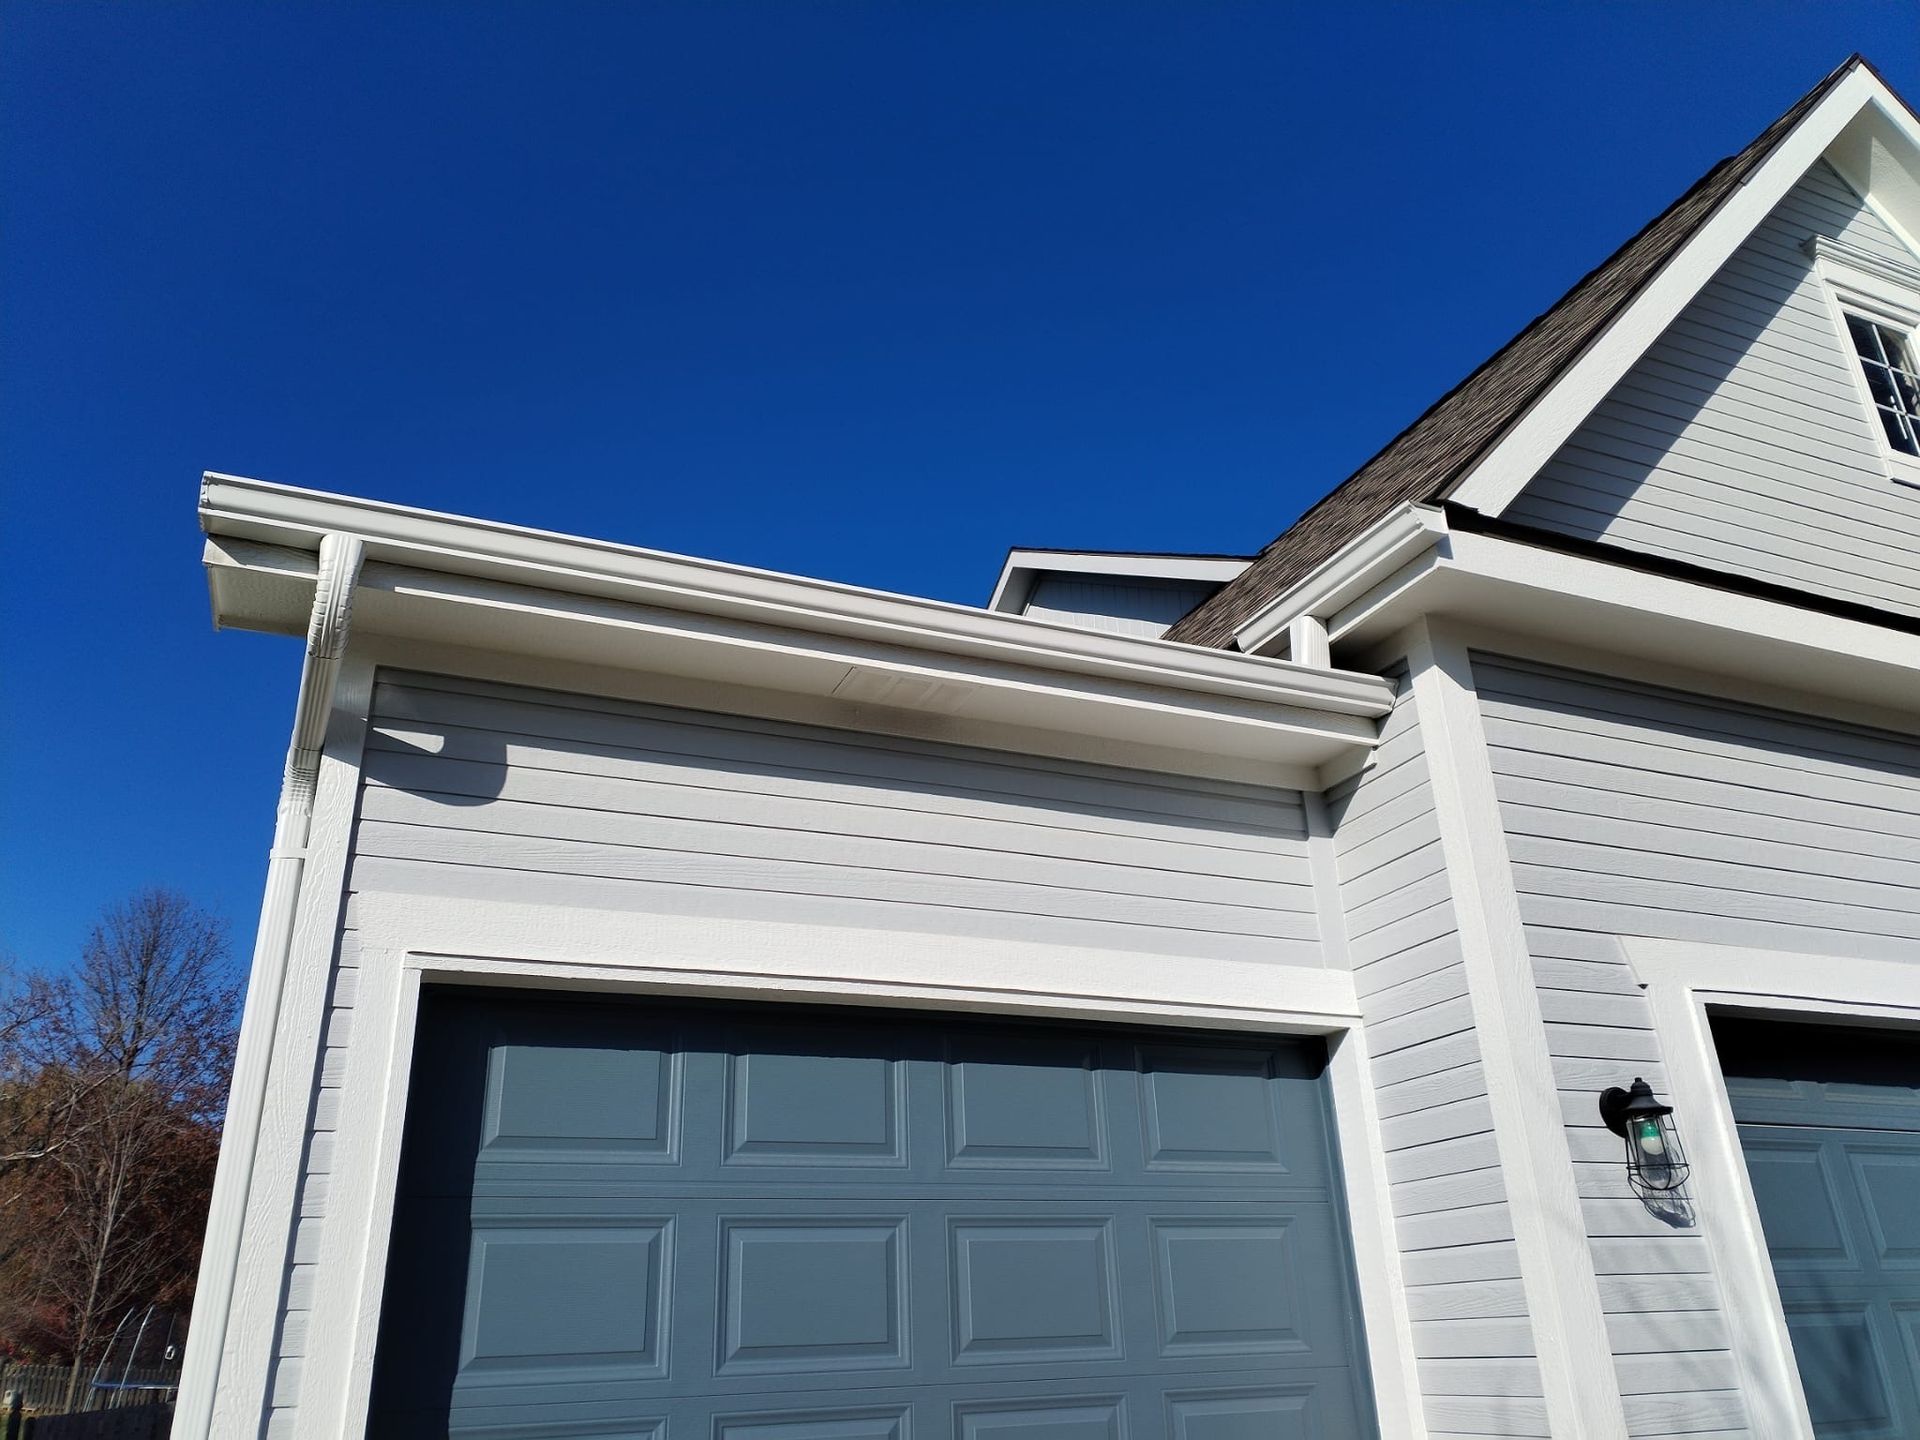
     A correctly installed drip edge creates a critical barrier between water and your home's structural components. This metal flashing directs rainwater away from vulnerable areas and into your gutters, serving as a first line of defense against moisture-related issues.

Preventing Water Damage

     Water that seeps behind gutters or underneath roofing materials can cause extensive structural damage. A properly installed drip edge prevents water from traveling up and under shingles through capillary action.

     The drip edge's design includes a slight outward bend that forces water to drop directly into the gutters rather than clinging to the fascia board.

     Regular inspection of your drip edge ensures it maintains its effectiveness. Look for gaps, rust spots, or areas where the drip edge has pulled away from the roof.

Protecting Fascia Boards and Roof Decking

     Fascia boards and roof decking are particularly vulnerable to moisture damage without proper drip edge protection. The drip edge creates a protective shield that keeps these wooden components dry.

When water consistently contacts unprotected fascia boards, it leads to rot, mold growth, and eventual replacement needs. Signs of compromised protection include:

  • Peeling paint on fascia boards
  • Visible water stains
  • Softening or crumbling wood
  • Mold or mildew growth

Impact on Roof Longevity

     A quality drip edge installation significantly extends roof life by preventing moisture infiltration at the roof's most vulnerable points. The metal flashing shields the roof deck's edge from water exposure.

     Without proper drip edge protection, roof shingles can begin to curl and deteriorate prematurely. The underlying decking becomes susceptible to water damage and rot.

Professional installation ensures proper overlap with shingles and correct positioning over gutters. The typical lifespan of a well-installed drip edge matches that of the roof itself, making it a crucial component of your roofing system.

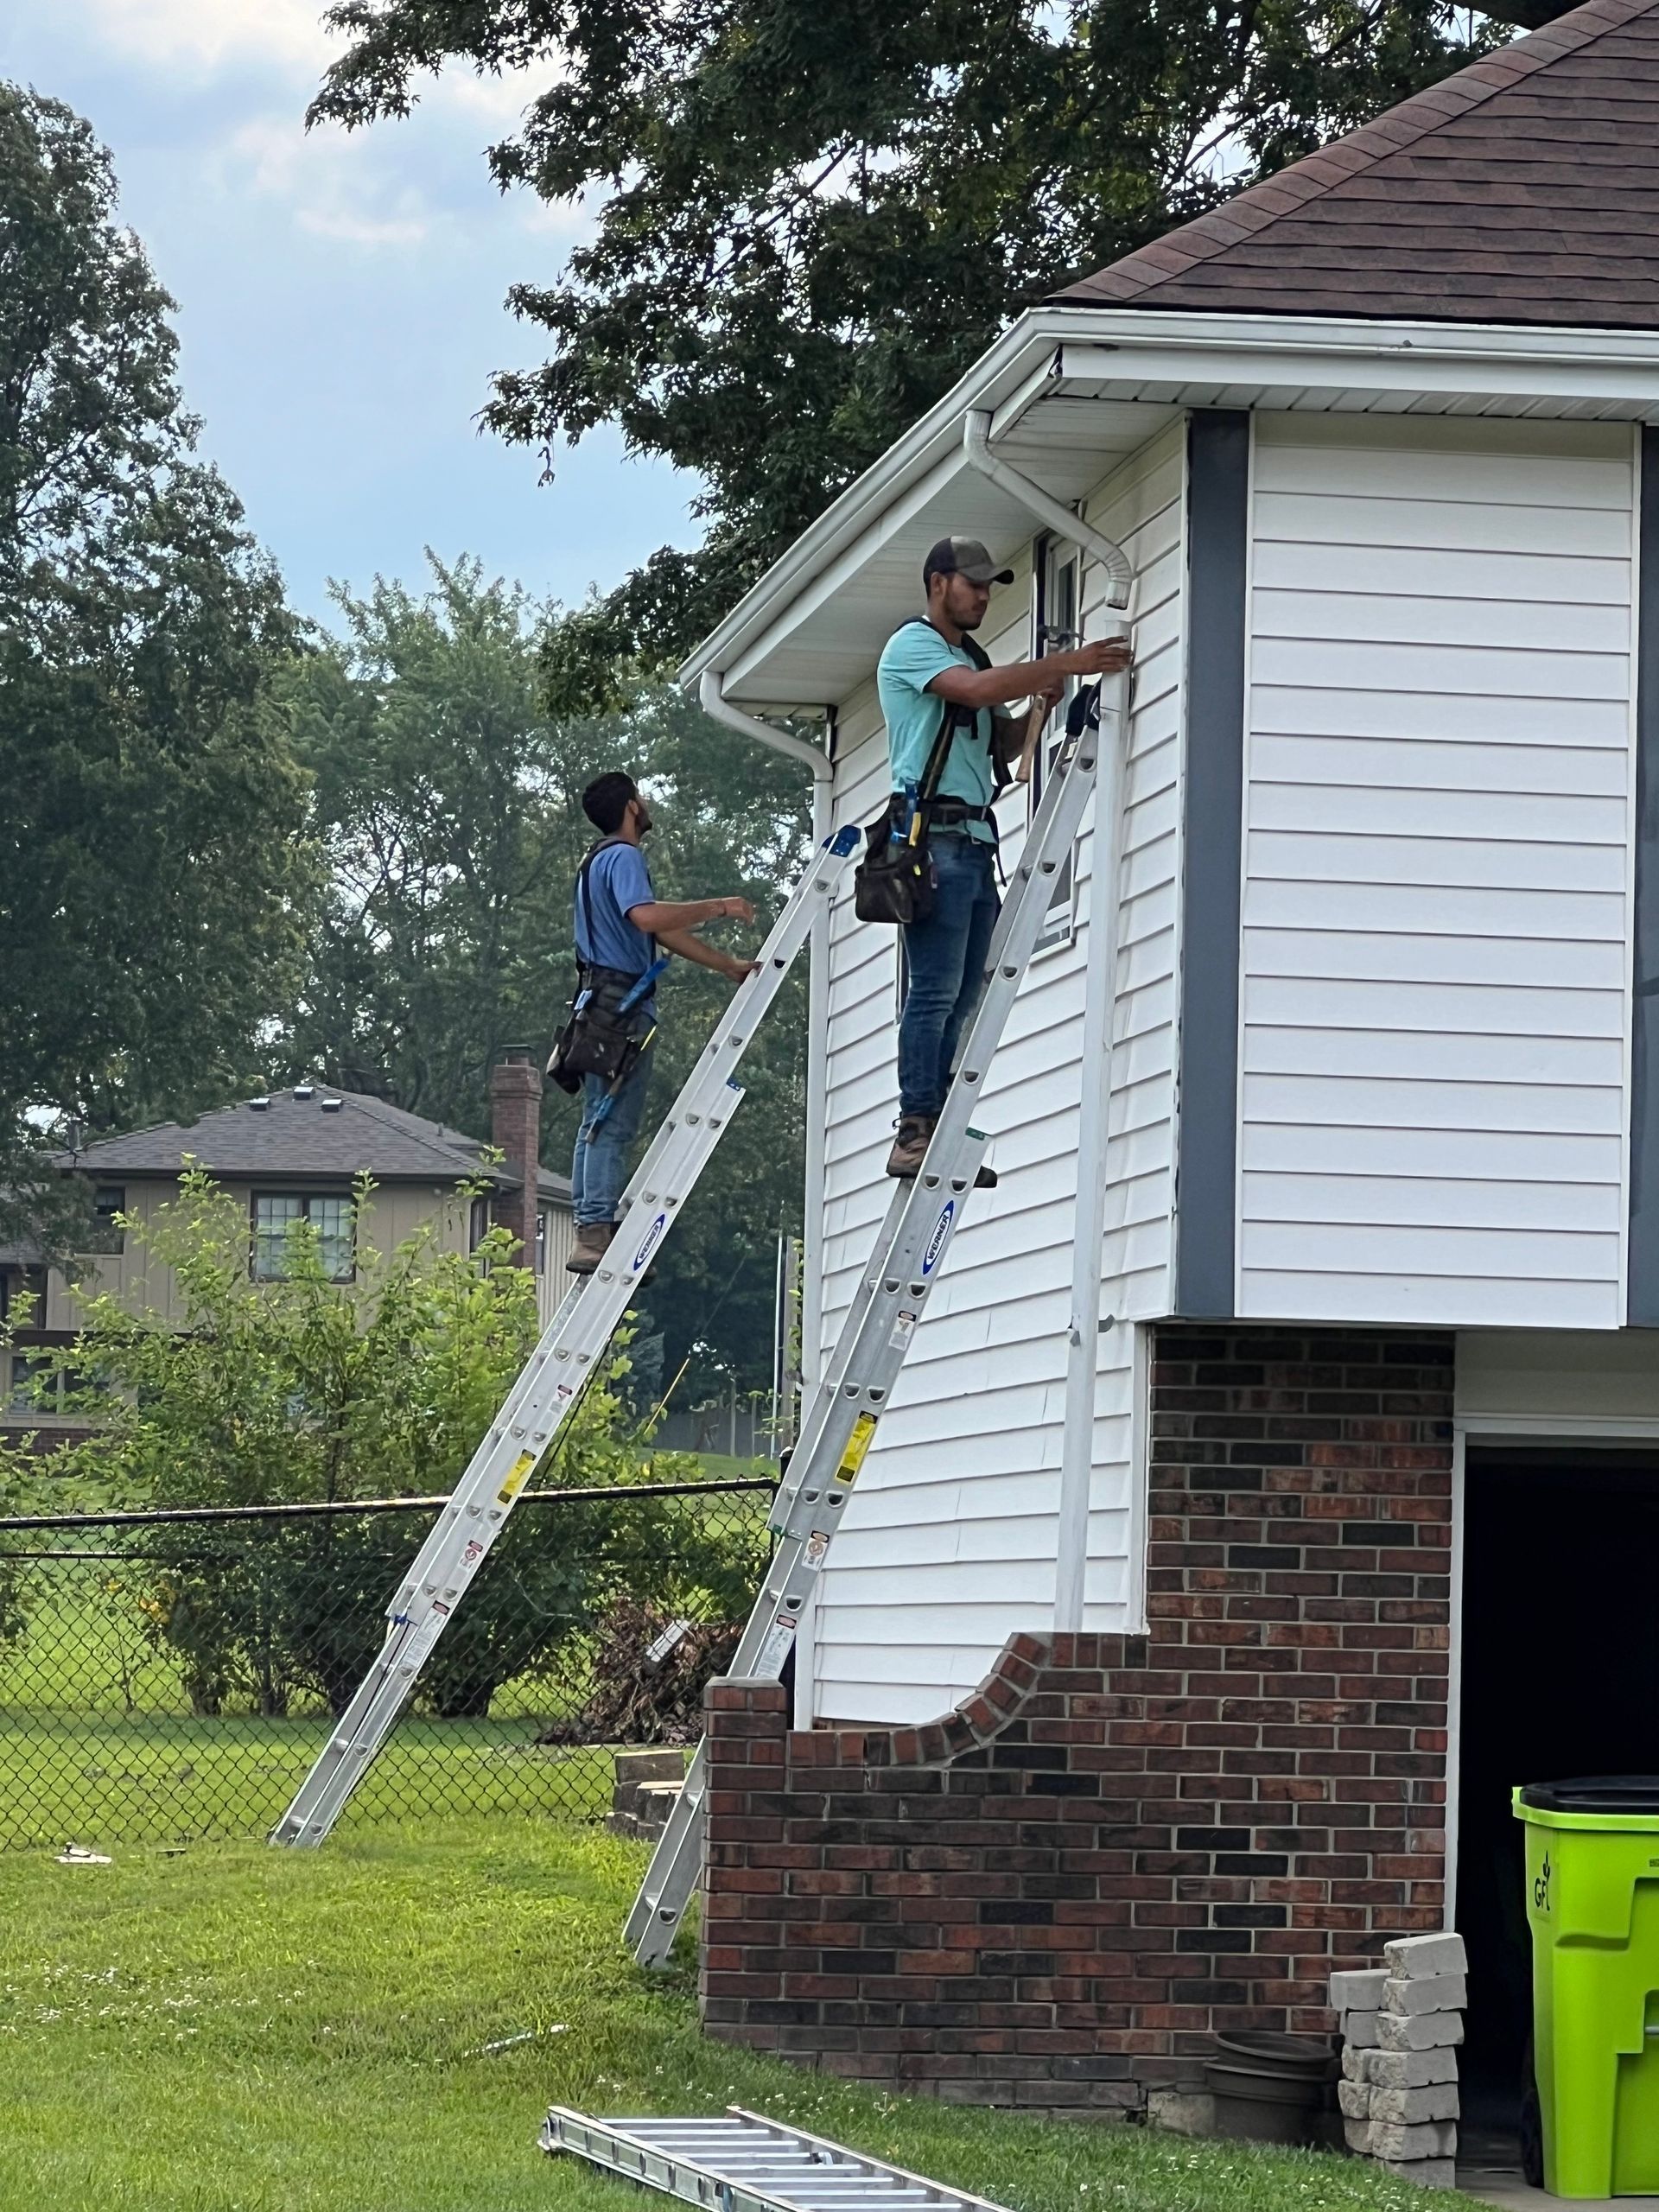
Step-by-Step Guide to Gutters Drip Edge Installation

     Proper drip edge installation creates a watertight barrier between your roof and gutters, preventing water damage to your fascia boards and foundation. Metal flashing directs water flow effectively while protecting vulnerable roof edges.

Preparation and Tools Needed

     You'll need a tape measure, tin snips, hammer, pry bar, and roofing nails. Gather safety equipment including work gloves, safety glasses, and sturdy footwear.

Choose aluminum or galvanized steel drip edge that matches your roof color and gutter system. The metal flashing should extend at least 2 inches onto the roof deck.

Required materials:

  • Drip edge flashing (enough to cover all eaves and rakes)
  • 1¼-inch roofing nails
  • Roofing adhesive
  • Gutter brackets and fasteners

Installing Drip Edge with Gutter Systems

Start at the eaves, working from left to right. Position the drip edge so it hangs over the gutter by ½ inch.

Overlap pieces by 2 inches in the direction of water flow. Cut angles at corners using tin snips at a 45-degree angle.

Place gutter brackets at 24-inch intervals. Ensure the drip edge sits properly above the back edge of the gutter to direct water flow effectively.

Securing with Roofing Nails and Screws

Place roofing nails every 4 inches along the drip edge. Drive nails straight and flush - not at an angle.

Secure the top edge first, then work your way down. Don't overdrive the nails, as this can create dimples in the metal flashing.

For extra protection in high-wind areas, apply a bead of roofing adhesive under the drip edge before nailing.

Tips for Neat and Water-Tight Results

Check alignment regularly using a level. The drip edge should maintain a consistent slope toward the gutters.

Seal any gaps at joints with roofing adhesive. Clean the metal surface before applying sealant.

Test water flow by spraying with a garden hose. Look for proper drainage and any signs of leaks or overflow points.

Small adjustments to gutter placement may be needed to achieve optimal water flow from the drip edge into the gutter system.

Troubleshooting and Maintenance Best Practices

Regular inspections and proper maintenance keep your gutter and drip edge system functioning at peak performance, protecting your home from water damage and extending the life of your roofing components.

Identifying and Fixing Common Installation Errors

A misaligned drip edge can cause water to seep behind the fascia board, leading to rot and structural damage. Check that the drip edge extends at least 2-3 inches past the roof deck and maintains a 30-45 degree angle.

Common Signs of Poor Installation:

  • Visible gaps between drip edge and fascia
  • Water stains on exterior walls
  • Rust or corrosion around fasteners
  • Sagging gutters

To fix alignment issues, remove affected sections and reinstall with proper overlap. Replace any corroded fasteners with stainless steel alternatives rated for exterior use.

When to Replace Drip Edge or Gutters

Metal drip edges typically last 15-20 years, while gutters can serve 20-25 years with proper maintenance.

Signs Replacement is Needed:

  • Visible rust or deterioration
  • Separation from roof decking
  • Bent or damaged sections
  • Multiple leaks or repairs

Inspect your system after severe storms for damage. Replace sections showing signs of wear before they compromise the entire roofing system.

Maintaining the Roofing System for Longevity

Clean gutters twice yearly - more often if you have overhanging trees. Remove debris and check for proper water flow.

Essential Maintenance Tasks:

  • Clear blockages from downspouts
  • Tighten loose fasteners
  • Check seals around joints
  • Clean accumulated debris from drip edge

Test water flow by running a garden hose along the roof edge. Look for proper drainage and areas where water might pool or overflow.

Apply rust-resistant coating to metal components showing early signs of corrosion. This simple step can add years to your system's lifespan.

You might also like

By Big T Gutters August 9, 2025
Learn how a gutter drip edge extender works, why it's important, and how it helps protect your roof from water damage and premature wear.
By Big T Gutters August 3, 2025
Dripping gutter joints can lead to serious water damage, compromising your home's foundation and exterior walls. The most common causes of leaking gutter joints are loose connections, deteriorated sealant, or improper installation, which can usually be fixed with basic tools and materials from any hardware store. Water damage from leaking gutter joints often starts small but can escalate into costly repairs if left unchecked. The telltale signs include water streaks on exterior walls, puddles near your foundation, or visible drips during rainfall. Catching these issues early can save thousands in potential repair costs. When your gutters work properly, they protect your home by channeling rainwater away from vulnerable areas. Regular inspection and maintenance of gutter joints helps prevent water infiltration and extends the life of your gutter system. Key Takeaways Leaking gutter joints typically result from loose connections or failed sealants that require prompt attention Regular inspection of gutter joints prevents costly water damage to your home's structure Simple DIY repairs with proper materials can effectively solve most gutter joint leaks Why Gutters Drip at Joints: Main Causes Gutter joints represent critical connection points in your home's drainage system where water frequently escapes due to specific structural and environmental factors. These connection points face unique stresses that can compromise their water-tight seal. Aging and Wear of Gutter Joints Natural settling of your home creates subtle movements that strain gutter joints over time. These tiny shifts gradually weaken the seals between gutter sections. Temperature fluctuations cause expansion and contraction of gutter materials, which puts additional stress on joint connections. This repeated movement loosens fasteners and breaks down sealants. Joint deterioration often starts small but progresses rapidly without intervention. A tiny gap can expand into a significant leak within just one or two seasons. Improper Installation and Poor Sealing Common Installation Issues: Incorrect spacing between sections Misaligned joints Wrong type of sealant used Insufficient fasteners Poor initial sealing leads to immediate or near-term leaks at joints. The wrong sealant choice can fail prematurely, especially in harsh weather conditions. Professional installation requires precise measurements and proper overlap at each joint. Even a small misalignment of 1/4 inch can create a path for water to escape. Debris and Clogged Gutters Leaves, twigs, and other debris collect around joints, trapping moisture against seals. This trapped moisture accelerates seal deterioration. Standing water from clogs puts extra weight on joints, causing them to sag and separate. The added pressure can break down even properly installed connections. Regular cleaning prevents debris accumulation at joints. Quarterly maintenance helps identify potential joint issues before they become serious leaks. Impact of Gutter Materials and Corrosion Material Vulnerabilities: Aluminum: Susceptible to galvanic corrosion Steel: Rust formation at joints Vinyl: UV damage to seals Copper: Green patina development Metal gutters face unique challenges from corrosion at joints. Salt air in coastal areas speeds up this corrosion process significantly. Different metals meeting at joints can create galvanic reactions. This chemical process weakens joint connections and creates pinhole leaks. Quality gutter materials with compatible components resist joint failures longer. Seamless gutter systems eliminate many joint-related issues entirely. How to Detect and Assess Leaking Gutter Joints Identifying gutter joint leaks requires methodical inspection and testing to pinpoint exact problem areas. Early detection helps prevent extensive water damage and costly repairs to your home's structure. Visual Signs of Leaking Gutter Joint Look for water stains or discoloration along the gutter seams during dry weather. These marks often appear as dark streaks or rust spots near the joints. Check for gaps, separations, or visible cracks where gutter sections meet. Even small openings can lead to significant leaks over time. Key indicators of joint problems: Rust or corrosion around metal fasteners Loose or missing screws at connection points Visible separation between gutter sections Peeling paint or oxidation near joints Water Testing Techniques Run water through your gutters with a garden hose on a dry day. Start at the highest point and observe water flow through each joint. Mark leak locations with chalk or tape for later repair. Pay special attention to corner joints (miters) where two sections meet at angles. Testing steps: Fill gutters slowly with water Watch for drips or streams at joints Check both inside and outside the gutter Test during daylight for better visibility Recognizing Related Water Damage Examine your home's exterior walls for water stains extending downward from gutter joints. These stains indicate ongoing leakage problems. Inspect the ground below suspect joints for erosion or water pooling. Saturated soil and damaged landscaping often reveal hidden leaks. Look for mold growth or rotting wood near gutter joints. These signs suggest long-term moisture exposure requiring immediate attention. Issues With Fascia Board and Downspouts Check fascia boards near gutter joints for soft spots, warping, or decay. Water penetration through failed joints often damages these supporting structures first. Examine downspout connections for proper alignment and secure attachment. Loose or misaligned downspouts put extra stress on nearby joints. Warning signs: Sagging gutters near joint areas Separated downspout connections Wet or discolored fascia boards Loose gutter hangers near joints Effective Repair and Prevention Strategies Fixing dripping gutter joints requires a systematic approach using the right materials and techniques. Professional-grade sealants, proper cleaning methods, and precise alignment work together to create lasting repairs. Cleaning and Preparing the Gutter Joint Remove all debris from the gutter using a plastic scoop or gloved hands. Pay special attention to the area around the leaking joint. Use a wire brush to thoroughly clean both sides of the joint, removing old sealant and any corrosion. A clean surface ensures better adhesion of new sealant. Dry the area completely with a clean cloth. Even small amounts of moisture can prevent proper bonding of repair materials. Test the joint alignment by running water through the gutter. Mark any spots where water pools or doesn't flow properly. Applying Gutter Sealant and Caulk Choose a waterproof gutter sealant rated for exterior use. Silicone-based products offer superior durability and flexibility. Apply a thick bead of sealant along the inside of the joint. Press firmly to work the material into any gaps or seams. For metal gutters, roofing cement provides an extra layer of protection when applied over the initial sealant layer. Let the sealant cure for 24 hours before testing. Avoid applying sealant if rain is forecast within the next day. Replacing Brackets and Re-Aligning Joints Check bracket spacing - they should be placed every 2 feet along the gutter length. Replace any loose or damaged brackets immediately. Adjust bracket heights to ensure proper slope. Gutters should drop 1/4 inch for every 10 feet toward the downspout. Use a level to verify alignment when installing new brackets. Misaligned supports can create pressure points that cause leaks. Tighten all fasteners securing the gutter to the fascia board. Loose connections contribute to joint separation. When Gutter Replacement Is Necessary Signs that indicate replacement need: Multiple failing joints Severe rust or corrosion Recurring leaks despite repairs Separated seams that won't stay sealed Professional gutter replacement services become cost-effective when repairs require more than 3-4 joint fixes. Consider seamless gutters for new installations. They eliminate most joint-related issues and typically last 20+ years. Upgrading to larger 6-inch gutters may solve persistent overflow problems that stress joints and connections. Long-Term Protection and Maintenance Tips Protecting your gutters from future drips and leaks requires a systematic approach focused on prevention and regular upkeep. Strategic maintenance combined with quality materials and proper installation techniques will maximize the lifespan of your gutter system. Gutter Guards and Preventing Clogs Types of Gutter Guards: Mesh screens Foam inserts Perforated metal covers Brush-style guards Gutter guards act as your first line of defense against debris accumulation. They block leaves, twigs, and other materials while allowing water to flow freely through the system. Select guards that match your local environment. Homes near pine trees need finer mesh compared to those dealing mainly with larger leaves. Professional installation ensures proper fit and prevents guard separation that could lead to water overflow. Check guards quarterly for damage or sagging. Maintaining Proper Gutter Slope The ideal gutter slope is 1/4 inch drop per 10 feet of gutter length toward the downspout. An incorrect slope causes water pooling and joint stress. Signs of Poor Slope: Standing water after rain Overflow during light rainfall Water marks under gutters Sagging sections Use a level to check slope annually. Mark problem areas for adjustment. Professional realignment may be needed if multiple sections show improper pitch. Small adjustments can often be made by repositioning hangers. Inspecting and Securing Gutter Hangers Check gutter hangers every spring and fall. Replace any that show rust, bending, or pulling away from the fascia board. Optimal Hanger Spacing: Every 2 feet in snowy regions Every 3 feet in moderate climates Additional support near downspouts Loose hangers create low spots where water collects. Tighten all fasteners during inspection. Use corrosion-resistant hangers rated for your gutter size and local weather conditions. Add supplemental supports in areas that regularly collect ice or heavy debris. Material Selection and Professional Maintenance Choose materials based on your climate and budget. Seamless aluminum offers excellent durability for most homes. Copper and steel provide enhanced strength for severe weather zones. Schedule professional inspections every 2 years. Experts can spot early signs of joint separation and perform specialized repairs. Key Maintenance Tasks: Seal joints with gutter-specific caulk Replace worn fasteners Repair small holes promptly Clean gutters thoroughly twice yearly Apply protective coatings to extend material life. Anti-corrosion treatments help prevent rust in metal systems.
By Big T Gutters July 20, 2025
Gutters are often overlooked in home maintenance, yet they play a crucial role in safeguarding your property's structure and value. Positioned strategically along the roof's edge, gutters channel rainwater and melting snow away from the home, preventing damage to the foundation and minimizing the risk of costly repairs. Without a proper gutter system, water can pool around the foundation, leading to cracks, leaks, and structural issues. By defending against water intrusion, gutters also protect other home elements, such as siding, landscaping, and basements, from potential harm. The addition of gutter guards or screens can further enhance this protection by ensuring the system operates without blockage from debris. Over time, this can extend the life of your gutters and reduce maintenance needs, making it a worthwhile investment for homeowners. Installing your gutters professionally, like the services offered by Big T Gutters, provides enhanced benefits. Professionally installed systems often come with tailored solutions that address specific home needs and local weather patterns. This ensures optimal performance and longevity, adding an extra layer of defense against potential water damage. Key Takeaways Gutters protect the foundation by directing water away. Regular maintenance and screens prevent clogs. Professional installation offers tailored solutions. How Gutters Defend Your Home From Water Damage Gutters play a crucial role in directing rainwater away from various parts of your home, thereby protecting its structural integrity. They prevent damage to the foundation, siding, and basement, substantially diminishing potential repair costs. Preventing Foundation Erosion A well-maintained gutter system channels rainwater away from the base of your home. Without gutters, rainwater can pool around the foundation, eroding the soil and weakening its support. Over time, this can lead to significant foundation damage, cracks in the walls, and even structural instability. Efficient gutter installation slopes slightly downward to direct water towards downspouts. Downspouts should further guide water at least several feet away from the foundation. By ensuring water is effectively diverted, gutters help maintain the structural health of your home. Protecting Siding and Exterior Walls Gutters protect your home's exterior walls from water damage. Without gutters, rainwater can overflow directly onto the siding, leading to unsightly stains, peeling paint, or even rot. This can expose the interior of your home to moisture, encouraging mold and mildew growth. By keeping water away from the walls, gutters preserve the appearance and lifespan of your home's exterior. Clogged gutters can obstruct water flow, leading to overflow and wall damage. Regular maintenance ensures clear gutters, preserving your home's aesthetic and structural integrity. Safeguarding Basement and Crawl Spaces Basements and crawl spaces are particularly vulnerable to water damage without effective gutter systems. Rainwater pooling near the home's base can seep into these areas, causing flooding, dampness, and fostering mold growth. Over time, this can compromise indoor air quality and lead to costly repairs. Properly angled gutters and functioning downspouts maintain dry basement environments. Installing gutter extensions or splash blocks can further ensure water is driven away from your home, providing an extra layer of protection against unwanted moisture intrusion. Regular checks and maintenance can significantly reduce the risk of basement water issues. Important Ways Gutters Contribute to Overall Home Protection Gutters play a crucial role in safeguarding a home from various environmental challenges. They'll channel water away to reduce roof damage, prevent ice dams in colder climates, and guard against soil erosion affecting your landscaping. Reducing Roof Damage Gutters help protect your roof by diverting rainwater away efficiently. Without them, water can accumulate, causing damage to shingles and promoting mold growth. By directing water away, gutters reduce the likelihood of leaks that can lead to costly repairs. In climates with heavy rainfall, functional gutters are vital for preventing waterlogged roofing materials, thus preserving the roof's longevity and effectiveness. Preventing Ice Dams and Winter Hazards In colder regions, gutters are key to preventing ice dams, which can form when accumulated snow melts and refreezes. Ice dams can damage roofing materials and lead to leaks. Properly maintained gutters ensure smooth water flow, reducing risks during freeze-thaw cycles. Implementing systems like heated gutter guards can offer additional protection, minimizing winter hazards and maintaining structural integrity. Minimizing Soil Erosion in Landscaping Gutters effectively direct rainwater away from a home's foundation, crucial for minimizing soil erosion. Without them, water can wear away topsoil and destabilize plants. By controlling water flow, gutters protect delicate landscaping and prevent foundation issues caused by accumulated moisture. Homes with well-maintained gutter systems can maintain their aesthetic appeal and structural soundness. Unique Benefits of Professionally Installed Gutters by Big T Gutters Professionally installed gutters by Big T Gutters offer unmatched longevity, cater to the local climate, and enhance overall energy efficiency. These benefits are crucial in maintaining your home's integrity and reducing long-term maintenance costs. Enhancing Gutter Longevity Big T Gutters uses high-quality materials designed to withstand harsh weather conditions. Their expertise ensures that the gutters are not only securely fitted but align perfectly with the roofing structure, enhancing durability. A professional installation minimizes leaks and sagging. This attention to detail extends the lifespan of the gutters, reducing the need for frequent repairs or replacements. Investing in professional installation is a cost-effective choice, ensuring long-term protection for your home. Custom Solutions for Local Weather Understanding local weather patterns is essential for effective gutter installation. Big T Gutters uses its extensive experience in the Cass, Johnson, and Jackson counties to address specific weather-related challenges. Tailored solutions ensure that gutters perform optimally during heavy rains or snow. Custom installations prevent overflow and direct water away from the foundation, safeguarding the home. These location-specific adjustments are invaluable in maintaining the structural health of the property. Improving Energy Efficiency Gutters play a significant role in maintaining indoor climate conditions. By effectively channeling rainwater away, they help prevent moisture buildup that can affect insulation efficiency. Big T Gutters' installations are designed to complement existing home features. Proper installation aids in keeping humidity levels in check, reducing strain on heating and cooling systems. By contributing to a stable indoor environment, professionally installed gutters also support lower energy bills, striking a balance between functionality and cost savings.

Book a Service Today